

The Definitive Guide to Starting a Small Business Email Newsletter and Collecting Emails
“72% of consumers prefer to receive permission-based marketing communication through email” – Exxact Target
Communicating with your readers and potential customers on a regular basis is essential.
Yet, for many small businesses, adding email communications to the marketing mix is an afterthought.
Just last week, I ran across an article published on Small Business Trends that stated some of the following regarding email marketing with a newsletter:
- Email is an affordable way to connect and maintain healthy relationships with your customers and readers of your blog (if you have one)
- Email marketing is a communications channel that you can use to send personalized messages to your readers and subscribers
The Essentials for Starting a Small Business Email Newsletter
To start your email newsletter and collect email addresses there are a few resources that you will need. They are as follows:
- An email newsletter service (I am currently using AWeber)
- A lead capture software/service (like Sumo.Me)
Starting Your Email Newsletter
Step 1: Sign up for an Account with AWeber

Step 2: Login to Your AWeber account to create your email list.
Step 3: Click on Manage Lists > Create a List.

Step 4: Add Your Company Information. This information should include:
- Your Company Name
- Your Company Website
- Add the mailing address that you want to appear on the bottom of your email newsletters
- Add a Sender Name and Sender Email Address
- Click Next Step

Step 5: Add Your List Name (This is the name of your Newsletter list)
- Add your List Name
- Briefly describe the emails your subscribers will receive from you
- Click Next Step

Step 6: Choose a confirmation Message (This message will be sent to new subscribers when they join your list)
- Choose a Pre-approved Subject Line (Options 4 or 5 in AWeber are best for personalized messages and email subject lines)
- Click on Approve Message & Create List

Setting up your Autoresponder Message
When someone opts into your newsletter, AWeber has an awesome autoresponder message feature that you can use.
The benefit to using this feature is that each time someone signs up for your email newsletter they will receive an automated follow up message from you with a freebie, ebook and etc attached.
Cool right?
To setup your autoresponder message in AWeber, here is what you need to do:
Step 1: In your AWeber account, under Messages, Choose Follow up Series

Step 2: Under Messages > Follow up Messages, choose Drag & Drop Email Builder

Step 3: Add a Subject Line to your Follow Up Message.
Examples of Subject Lines for followup messages:
- Firstname, Welcome to [Your Newsletter Name]
- Firstname, Thank You For Signing up to Receive the [Your Newsletter Name]
Step 4: Under Message properties, select Choose Templates to select a Newsletter Template, then click Apply. Next, add content to your newsletter template.

Examples of content that you can add to your follow up messagse:
- Firstname, Welcome to [Your Newsletter Name]. As a new subscriber you are getting instant access to my free eBook. Each time that I publish a new blog post, you will receive a notification from me. Again, Welcome!
- Firstname, Thanks for signing up to receive my email newsletter. From time to time, you will receive an email from me covering the latest and greatest from [Your Site Name].
Step 5: Next, Click Attachments to attach to your freebie to your Newsletter (this is if you’re planning to give away a free gift to your email subscribers. Some examples of great giveaways include: eBooks, Tip Sheets and Cheat Sheets.

Step 6: Click Save
Step 7: Click Next. Then Click Save & Exit.
Step 8: Click Send a Test (to send yourself a test message (to review your autoresponder message to make sure it’s good to go)

Woo hoo! Your follow up email email notification has now been setup.
Collecting Email Addresses and Building your List
To collect email addresses and build a list, Sumo.Me (because it integrates easily with AWeber) is the resource that I use. To start collecting email addresses, you will need to do the following:
Step 1: Head over to the Sumo.Me and sign up for an account.

Step 2: Follow the instructions for installing the Sumo.Me software package onto your website based on the platform you are using.
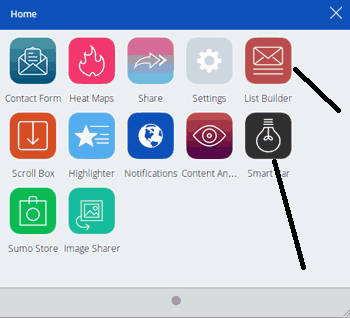
Step 3: Activate the SmartBar and ListBuilder apps from the Sumo.Me menu
Step 4: Connect these services to your list in AWeber. Here is a more in depth tutorial on how to integrate ListBuilder and Smartbar with AWeber.
Step 5: Customize your Listbuilder pop-up notification and SmartBar for your website.
Woo hooo! You have successfully setup your website to collect email addresses and build your list of email subscribers.
I hope that this tutorial has been helpful to you. If you liked this content, I would love for you to share it with your friends and peeps. Thanks!
**This post contains affiliate links**